

Getting Started
Xray Zero associates a web form with a Microsoft Word document template. The form produces variables which are written into the template to generate a document. The variables may be as simple as direct text input, lists of offenses with statute numbers and names, or complex computed values like current weather conditions from the National Weather Service.
Variables may also be populated from reusable data you store in the system like common locations, lists of seizure items or scope for search warrants, and offenses.
Step 1: Add a Form
Choose one of the two methods below to add a form to your agency's Library. The library tab within your agency is where you manage both forms and templates.
1a. Form Builder
Create your own web form with Form Builder, which lets you customize every component and display option down to the variable name and icon. It will take a little longer to get started this way and there is additional documentation in the Form Builder section below.
1b. Access Admin Page
Select the gear icon in the top right of the main application right next to your name.

1c. Access Form Builder
Choose the Library tab then Form Builder.

If you're creating a new form, see the Form Builder section below, then come back here. If you're using a .json file provided by either Xray Zero or another agency, skip ahead to "Upload (Import) Config File" instead.
Now head back to the admin section.
Step 2: Assign Form Permissions
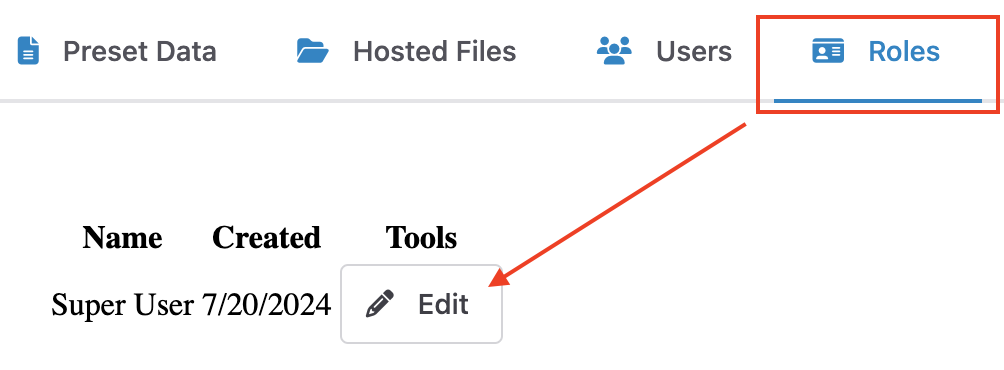
Users need permission to actually use forms. This allows you to control which types of users can use which forms via Roles. Select the Roles tab and then the Edit button next to "Super User". "Super User" is the default role assigned to you as the agency administrator and should only be assigned to users who may have full control over the application. Ensure you are creating a new role for regular users like "Officer" or "Supervisor". For now, this means you're giving yourself (and any other Super User) permission to use the form.
For now, check the box for your newly added form on the right side under "Generators Whitelist".
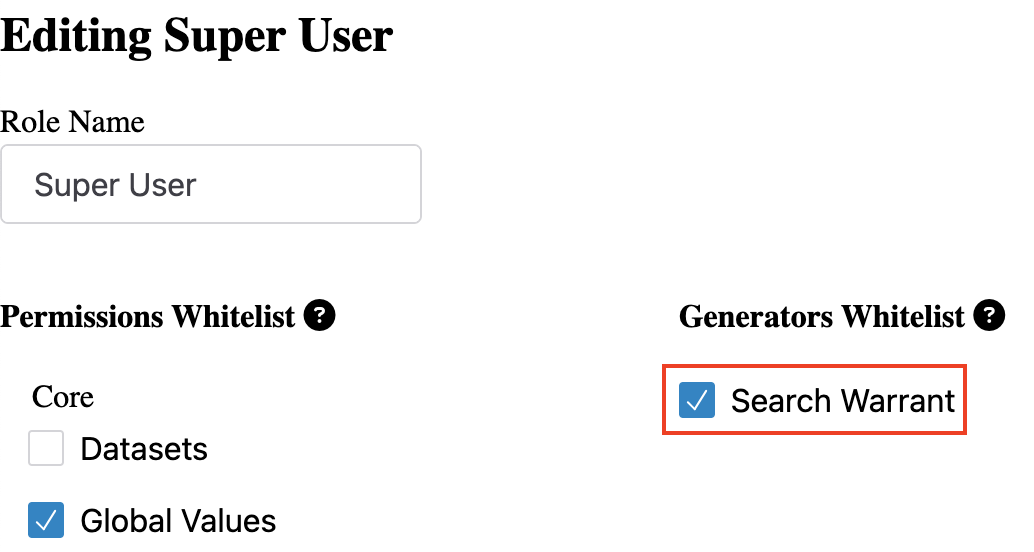
Congratulations — you've successfully added a form and given a role permission to use it.
Step 3: Upload Template to Form
The final step is to upload a Word template to the form in your agency's Library. This template contains special syntax to receive your users' data input. It's the most important piece of the Xray Zero system, and although it looks like code on the surface, it's easy to learn and far more powerful than "fillable forms".
Any given form will contain certain variables. These variables must match those within the Word template, or pieces of data will be missing. It's best to get a copy of the Word templates from another agency and adapt them for your own use. When using the Form Builder, Xray Zero can give you a list of the variables and automatically detect when something is wrong in a Word template.
There are several "starter" forms in the Templates section. The full template syntax (variables, filters, widget variables) is documented in Template Reference.
For a very basic template with variables found in most or all templates, copy and paste the following into a Word document:
Xray Zero Test Document

    Case number: {crn}
    Today's date is: {today}
    The current time is: {now}

    Created by: {deputy}
    Agency: {agency}
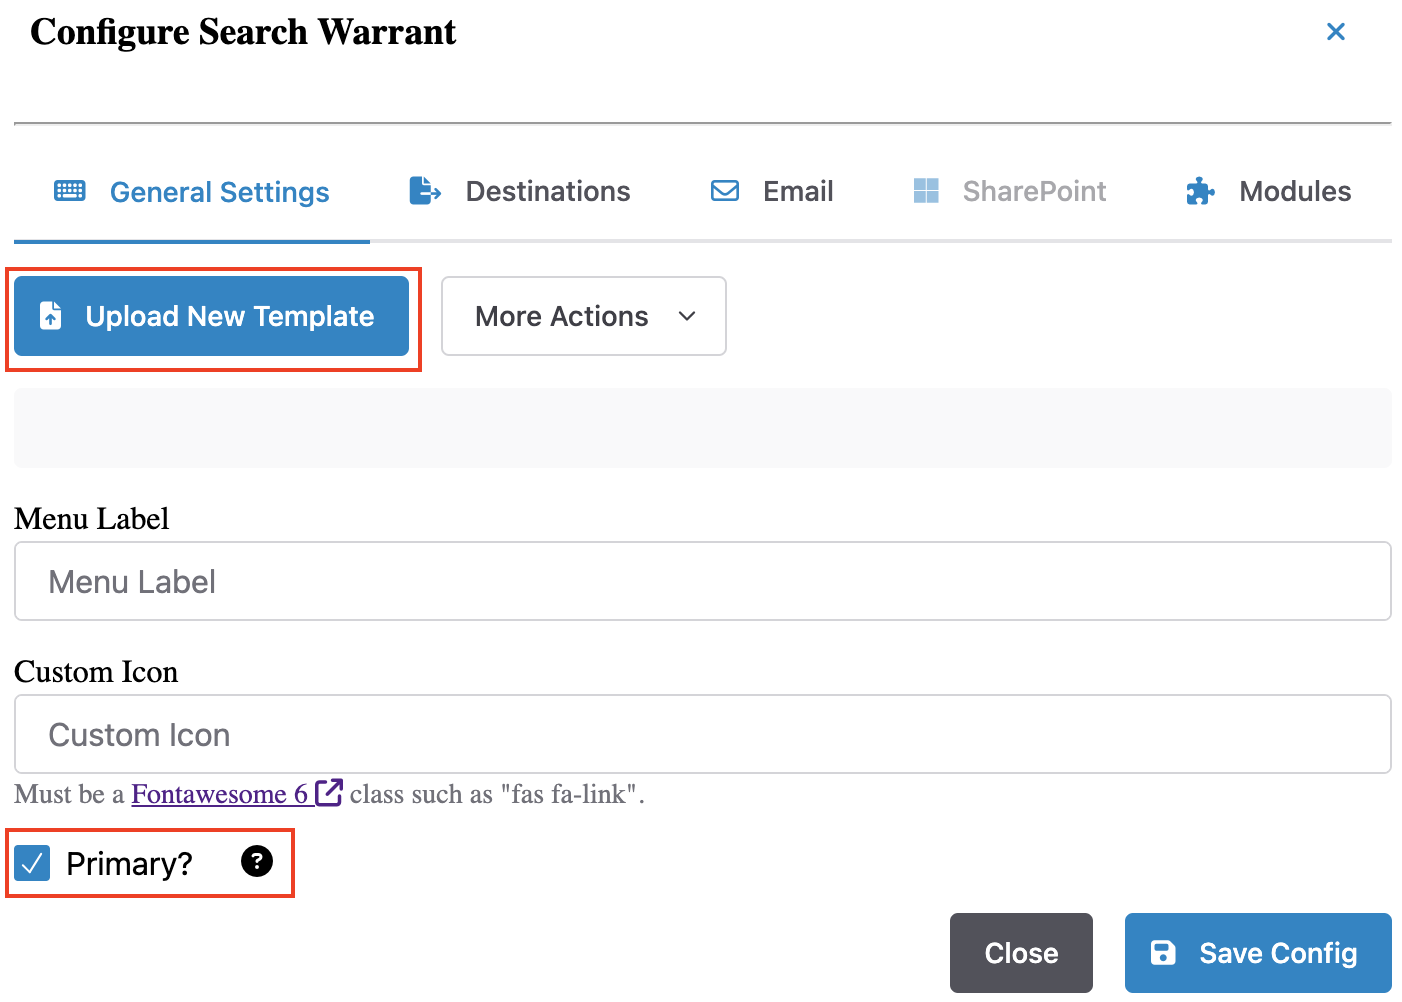
Your template is the Microsoft Word .docx document you just created. From the admin page choose the Library tab, then locate your form by its name in the list. Check the Enabled? switch to activate the form, then click the yellow tools button to edit it.

In the popup window click the Upload New Template button, then choose your template file. Before saving and closing the window, ensure the Primary? checkbox is checked (it may already be). This means the form will appear in the Generators dropdown in the application.
Step 4: Try it Out
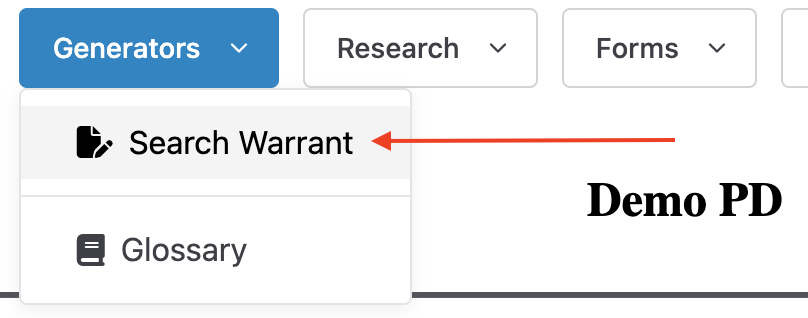
Go back to the application page and refresh it. This is needed to see new changes made from the admin page. From the Generators dropdown you should now see your form by either its name or menu label (if you changed it).
Next Steps
Set up a meeting with Xray Zero staff to get the most efficiency you can out of the system. Ask about the Firearms Qualifications and Vehicle Inspections modules.
- Customize your agency's Global Values: set defaults for your users, upload a custom logo, create a "message of the day" for everyone to see.
- Create roles:
- Create Users. Have a lot of them? Consider importing from a spreadsheet.
- Enrich the data: start adding links and hosted files, add Offenses, Presets, and Locations to maximize efficiency.
Thank you for taking the time to try Xray Zero. We are always here to help via email, phone, Zoom, or whatever it takes to ensure you are getting the best experience possible. Feedback and new ideas are always welcome.
Form Builder Reference
Create New Form
Edit general form information and name via the "Edit Form Properties" button in the top right corner. Keep in mind there is currently no auto-save feature.
Sections
Sections are the largest unit of organization and provide a larger heading label and icon.
Action Section. A section action means the section will be hidden and a button called "Create {Section Heading}" will automatically be created to show it. A second button called "Generate {Section Heading}" will also be shown. The section action generates a document based on the action template it is tied to, using the same form data (and any extra fields placed in the action section). This allows for related forms to be easily accessed from the same form page.
Contingent Section. Contingent sections are also hidden and only appear when a variable elsewhere in the form becomes equal to a specific value.
Rows
Rows simply contain fields and can control horizontal alignment.
Fields
Fields capture user input and associate it to a variable name. The variables can be of varying types and are later populated with data in the Word templates. Fields may also be specific "widgets" which are designed to collect specific information in a more organized manner, such as offenses and victims. See the widget reference in Template Reference.
Upload (Import) Config File
A config file contains all the data needed to send a custom form to someone else. The filename should end in .json and can be imported or exported from the arrow dropdown.
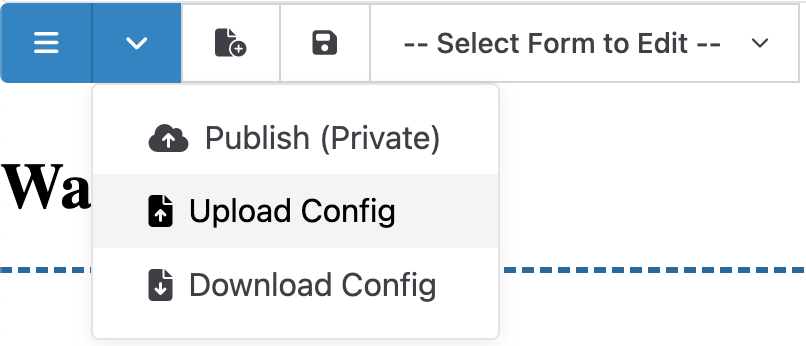
After choosing the .json Config file to upload, press the save button so it is loaded into your agency's library. You can now make any changes as needed.
Publish Forms
Publishing a form duplicates it and increments the revision number. This allows old versions to stay in service while new drafts are worked on without impacting users.
Get Form Information
After following the Getting Started guide using a Form Builder form, you can tell which ones were created with Form Builder by the trowel-and-bricks icon next to them in your library.

This means additional information is available in the edit menu (screwdriver-and-wrench icon). Under the "More Actions" menu you can query the relationship between your form and the Word document associated with it.
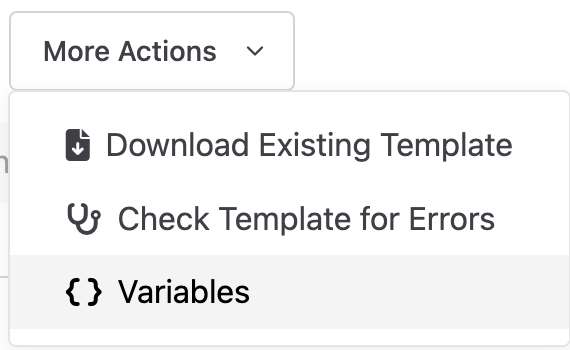
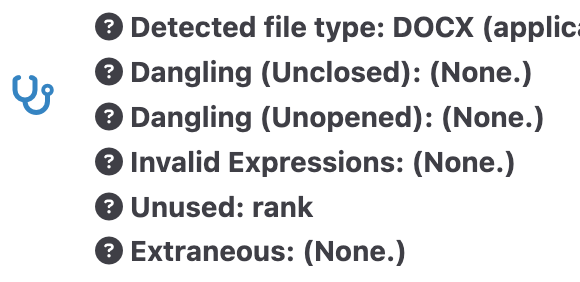
Check Template for Errors. The template health check tells you if there are any problems with syntax (a missing bracket {}, a typo, etc.). It also tells you which variables are not being used in the Word template, and the inverse — which variables are in the Word document but aren't provided by the form.
Variables. This pops up a list of all the variables available in the form, with variable name, label, input type, and required flag. Keep this handy while editing the Word template.